Garlic
WHEN TO PLANT
Garlic survives bitterly cold winters underground (or grows frost-hardy leaves where winters are mild to moderate), grows rapidly when the weather warms in spring, and bulbs in summer. In the North, plant 4-6 weeks before the ground freezes. This gives the plant time to make good root development but not enough time to make leaf growth. Where winters are milder, garlic is planted from October through January. Where winters are so severe or snow cover so unreliable that garlic freezes out, soft-neck varieties are planted in spring.
SOIL PREPARATION
Break the bulb into individual cloves. Small cloves usually grow small bulbs, so plant only the larger ones. Use the small cloves in your kitchen. Where winter is mild, plant cloves 1 inch deep, root side down; where winter is severe, put them 2-4 inches deep and mulch lightly, immediately after planting. In spring, the garlic will have no trouble pushing through an inch of mulch. Minimum spacing in raised beds is 4 x 8″. To grow the largest bulbs, try spacing your plants 6 x12″.
GROWING
After garlic has overwintered it must be kept well weeded. Do not damage the shallow roots when cultivating. Garlic needs to be moderately fertilized as soon as it begins growing in spring. Organic gardeners can side-dress a little chicken manure, seed meal or strong compost. Garlic also likes high-nitrogen foliar fertilizer, sprayed every ten days to two weeks. Once bulbing begins, fertilizing is useless, maybe even harmful to getting the best quality bulbs. While the plant is rapidly growing, keep the soil moist as you would forany other leafy green like lettuce or spinach.
SEED STALKS
Hard-neck varieties put up a tall, woody flowering stalk that usually grows bulblets at the top. But if the plant is allowed to put its energy into these seeds, the bulb forming below the ground will end up smaller. So we cut seed stalks off as soon as the flower head has reached 8-9 inches tall.
HARVEST
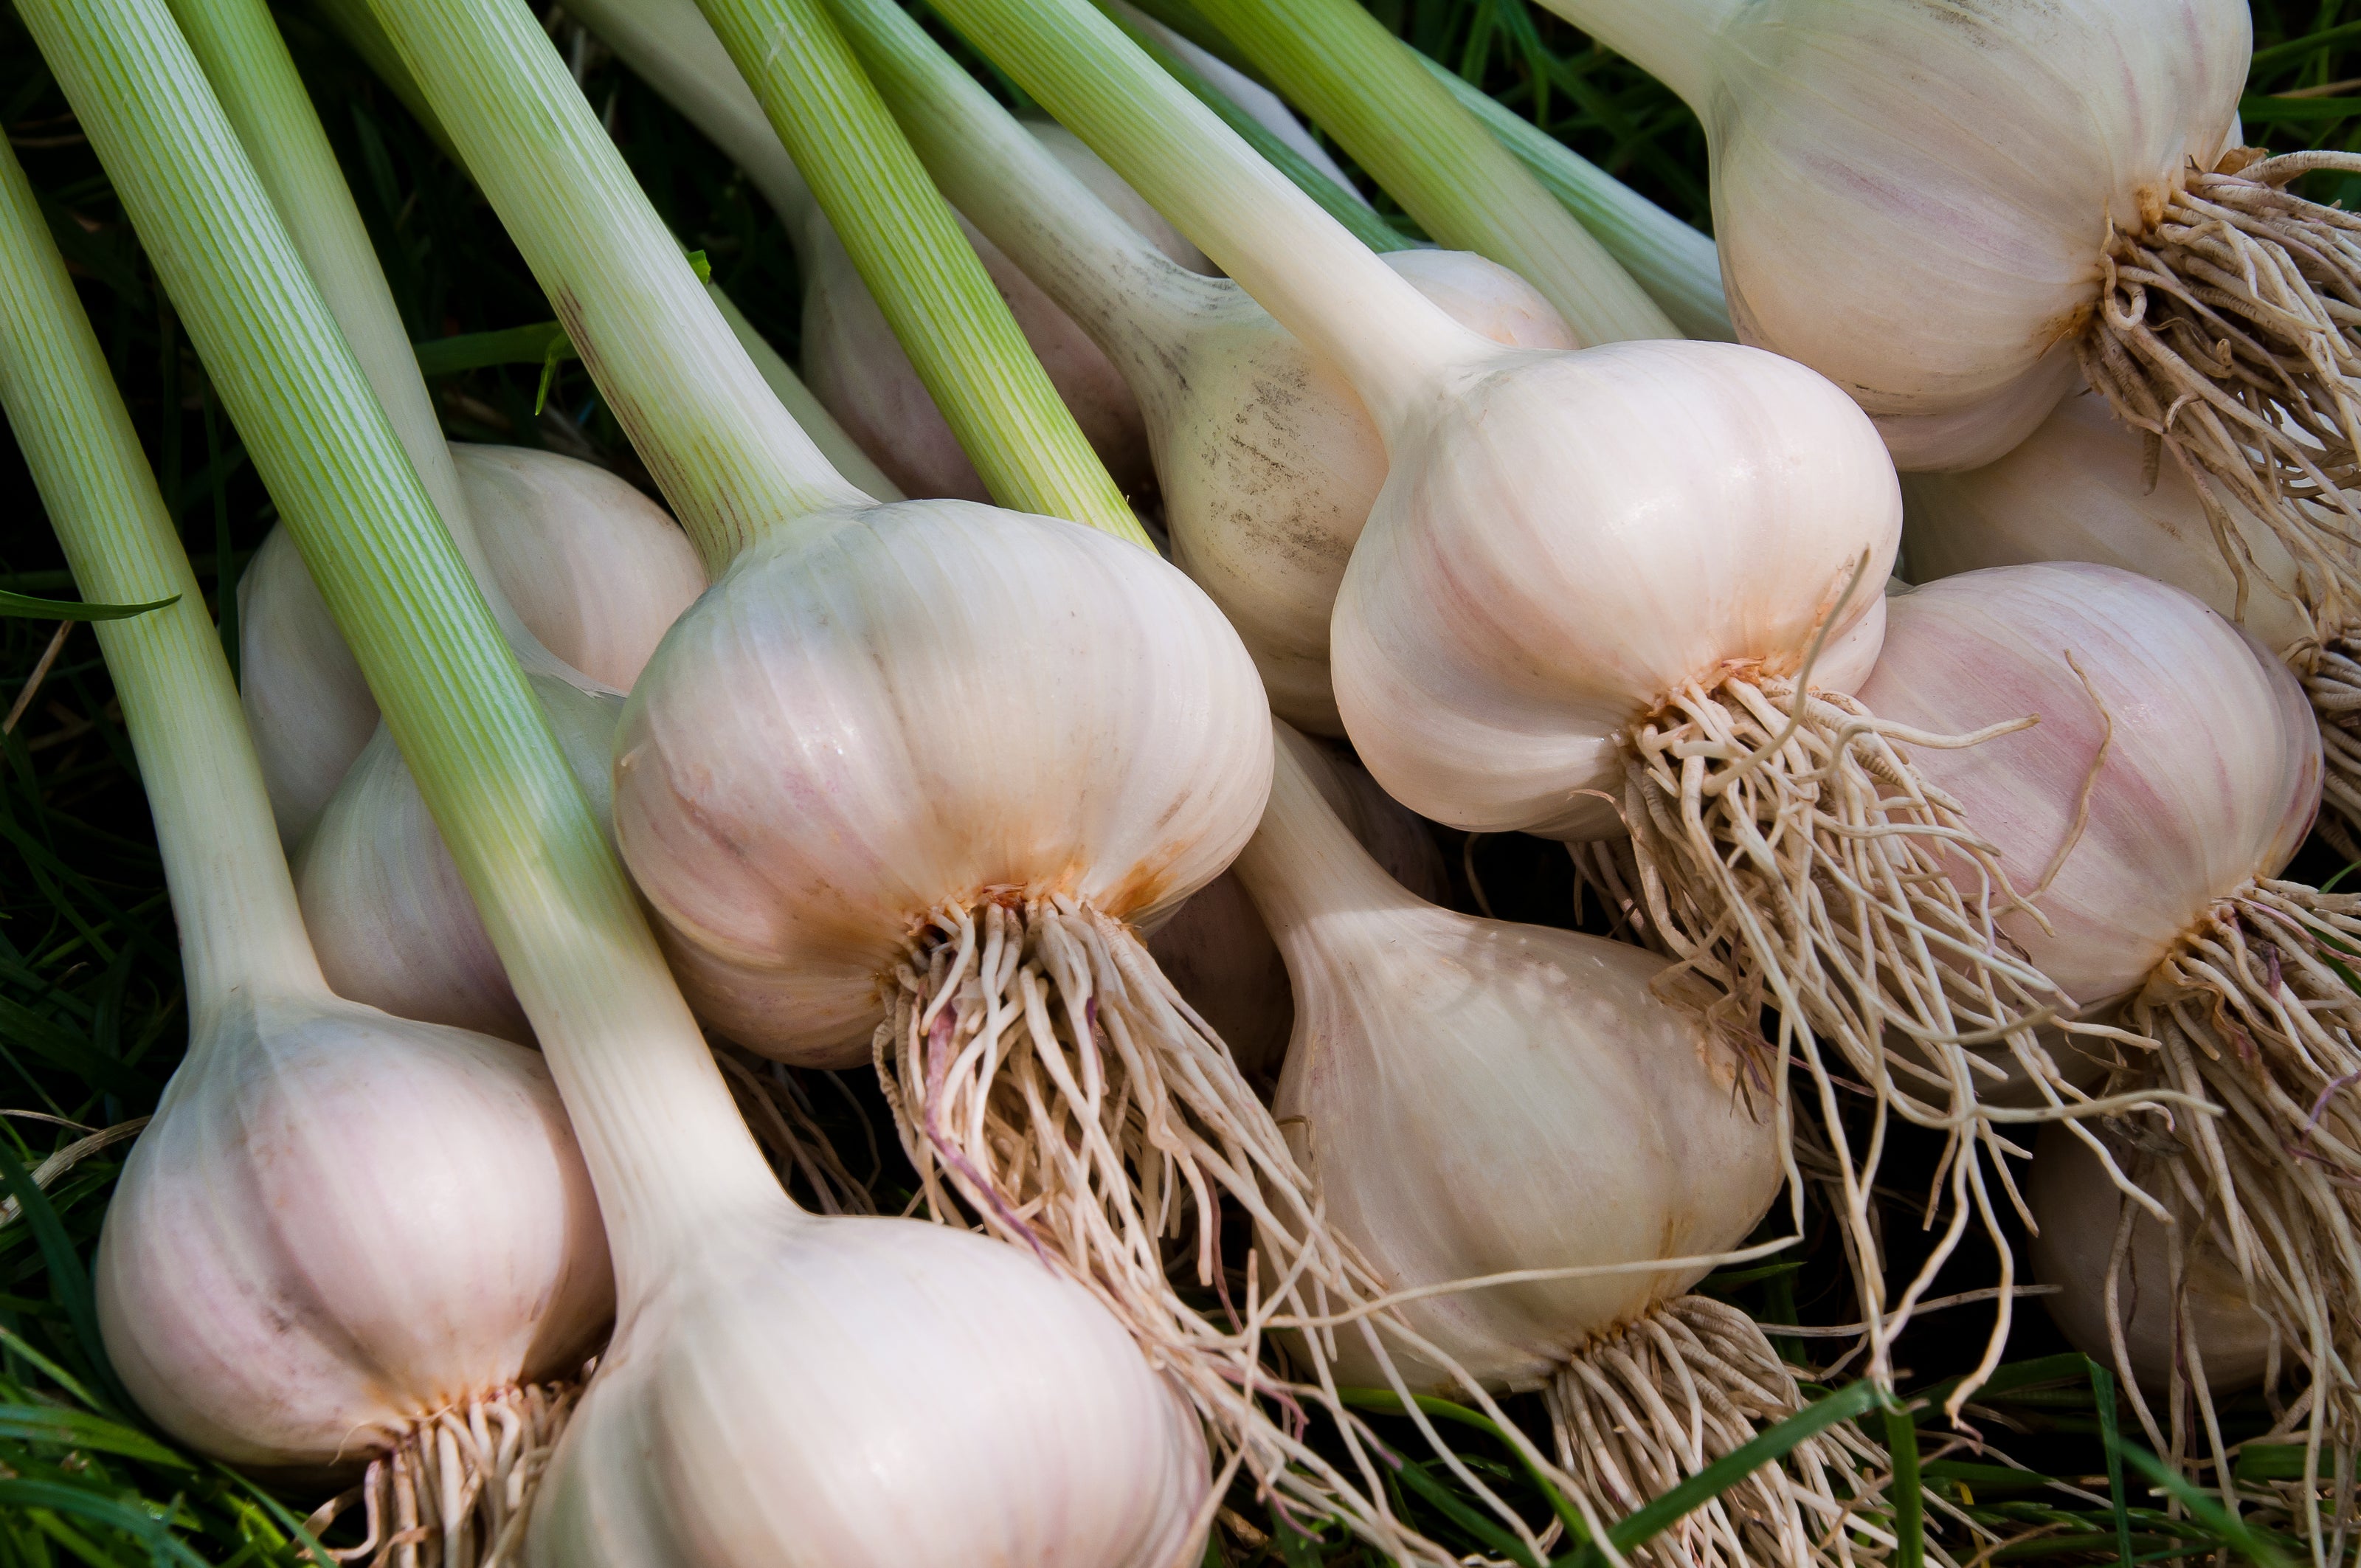
Gauging the right time to harvest is very important. Dug too soon, the skins won’t have formed around each clove. Hard-neck bulbs, if dug too late, may have begun to spread apart in the soil. Each year, the timing will be a little different, so rather than watch the calendar, observe the plants. As the bulbs mature the leaves brown off. When there are still 5-6 green leaves remaining on the plant, dig and examine a plant every few days to check the bulb. (Incidentally, immature bulbs that haven’t fully developed skins around their cloves can be chopped up like onions and make delicious additions to cooking.) In very good garlic ground (very fluffy soil), the plants might be pulled by hand, but it is usually better to loosen the soil first with a spading fork. Immediately brush off the soil from around the roots, but do this gently. Drying is the essential part of curing the bulbs so do not wash them in water. Immediately move the newly dug garlic out of direct sunlight.
CURING
Some growers tie the plants by their leaves or stalks in loose bundles of 8-12 plants and hang them under cover. Others spread the plants in single layers on screens, drying racks, or slatted shelves. Garlic stores longer if it is cured with its stalk or leaves attached. Good air circulation is absolutely essential. The plants should cure from 3 weeks to 2 months, depending on the humidity and amount of air circulation. Some growers use a fan in the curing shed. After curing, you may trim the roots. If the garlic is to be kept in sacks, cut the stalks off 1/2-inch above the bulb and gently clean the bulbs with a soft bristle brush, taking care not to strip off the papery skin.
STORING
Hang bulbs in netted sacks, with good air circulation on all sides. Or, hang the dried bunches, or make and hang braids of the soft-neck types. Perfect storage conditions are 45-55°F at 50% Relative Humidity. Storage below 40°F actually makes garlic sprout.
ELEPHANT GARLIC
The enormous cloves should be planted deeper, 4-6 inches deep. The huge leafy plants may become 3 feet tall. So we recommend spacing Elephant Garlic 12 inches apart in rows 3 feet apart. Elephant Garlic is quite cold hardy. Occasionally a fall-planted clove (usually a smaller one) fails to divide into segments and instead, forms a single “round,” like a small onion. Rounds can be replanted whole and will make a very large regular bulb the next year.
At harvest time you’ll notice corms protruding from the base of the bulb. These are small, nut-like cloves with sharp tips and thick, tough skins. Corms may be planted like regular cloves if first scored and then soaked overnight in water. Plants grown from corms will be much smaller than those started from cloves and will not produce giant, segmented bulbs the first year, but will make only rounds. These rounds are delicious and can be cooked like huge pearl onions. Or, rounds may be replanted to grow a second time, and the next year they’ll make a regular head containing 4-6 huge cloves. Elephant Garlic that is planted late in the spring will only produce rounds. Unlike true garlic, Elephant Garlic makes a large, showy flower on a stalk that grows 5′ high. The seeds within it are rarely fertile. These flower stalks divert some of the plant’s energy and should be clipped off when they are 8-9 inches tall. Two pounds plants 7-10 row feet.
Potatoes
PLANTING PREP
The optimum soil temperatures for good growth range from 55-70 degrees F.A week or two before your planned potato planting date, set your seed potatoes somewhere where they will be exposed to some warmth (between 60 and 70 degrees F) and lots of light. This will induce them to begin sprouting. A day or two before planting, use a sharp, clean knife to slice the larger seed potatoes into “seeds”. Each seed should be approximately 1½-2 inches square, and must contain at least 1 or 2 “eyes” or buds. Smaller potatoes may be planted whole. In the next day or so, your seed will form a thick callous over the cuts, which will help to prevent it from rotting once planted.
ROW PLANTING
Traditionally potatoes are grown in rows. Dig a shallow trench about 4 inches wide and 6-8 inches deep. The spacing at which you place the seed pieces will determine the harvested potato size. For most household uses, you will want to plant your potato seeds 15 inches apart in this trench. If you’d like a quick crop of “baby” potatoes for soups and stews, you can plant the seeds 4 inches apart, and begin harvesting them as soon as they reach the desired size. Place the potato seeds into the trench with the cut side down and then cover them with 3-4 inches of soil. Do not fill the trench completely with soil.
Depending on the soil temperature, the sprouts will begin to emerge in about 2 weeks. At this time add another 3-4 inches of soil. Your crop of potatoes will form between the seed piece, and the surface of the soil. For this reason, when the stems are about 8 inches high, you once again add enough soil to bring the level half way up the stem of the plant. Another hilling will be needed 2-3 weeks later, at which time you again add soil half way up the stem of the plant.
After these initial hillings, it is only necessary to add an inch or two of soil to the hill each week or so, to ensure there is enough soil above the forming potatoes that they don’t push out of the hill and get exposed to light. If the new potatoes are exposed to sunlight while they are developing, they will turn green (which may be toxic). This hilling process is necessary to create sufficient space for the potatoes to develop large tubers, and an abundant crop. Don’t get carried away with hilling though…if you cover up too much of the foliage, you may end up reducing your final crop yield.
MOUND PLANTING
If space is limited or if you would only like to grow a small crop of potatoes, you may prefer to plant one or two potato mounds. Each 3-4 ft diameter mound can support 6 to 8 potato plants. With either method, the first step is to cultivate and turn the soil one last time before planting, removing any weeds, rocks or debris. This will loosen the soil and allow the plants to become established more quickly. Your potato plants will benefit from the addition of compost, well composted manure, and other organic matter to the soil.
WATERING & CARE
HARVEST
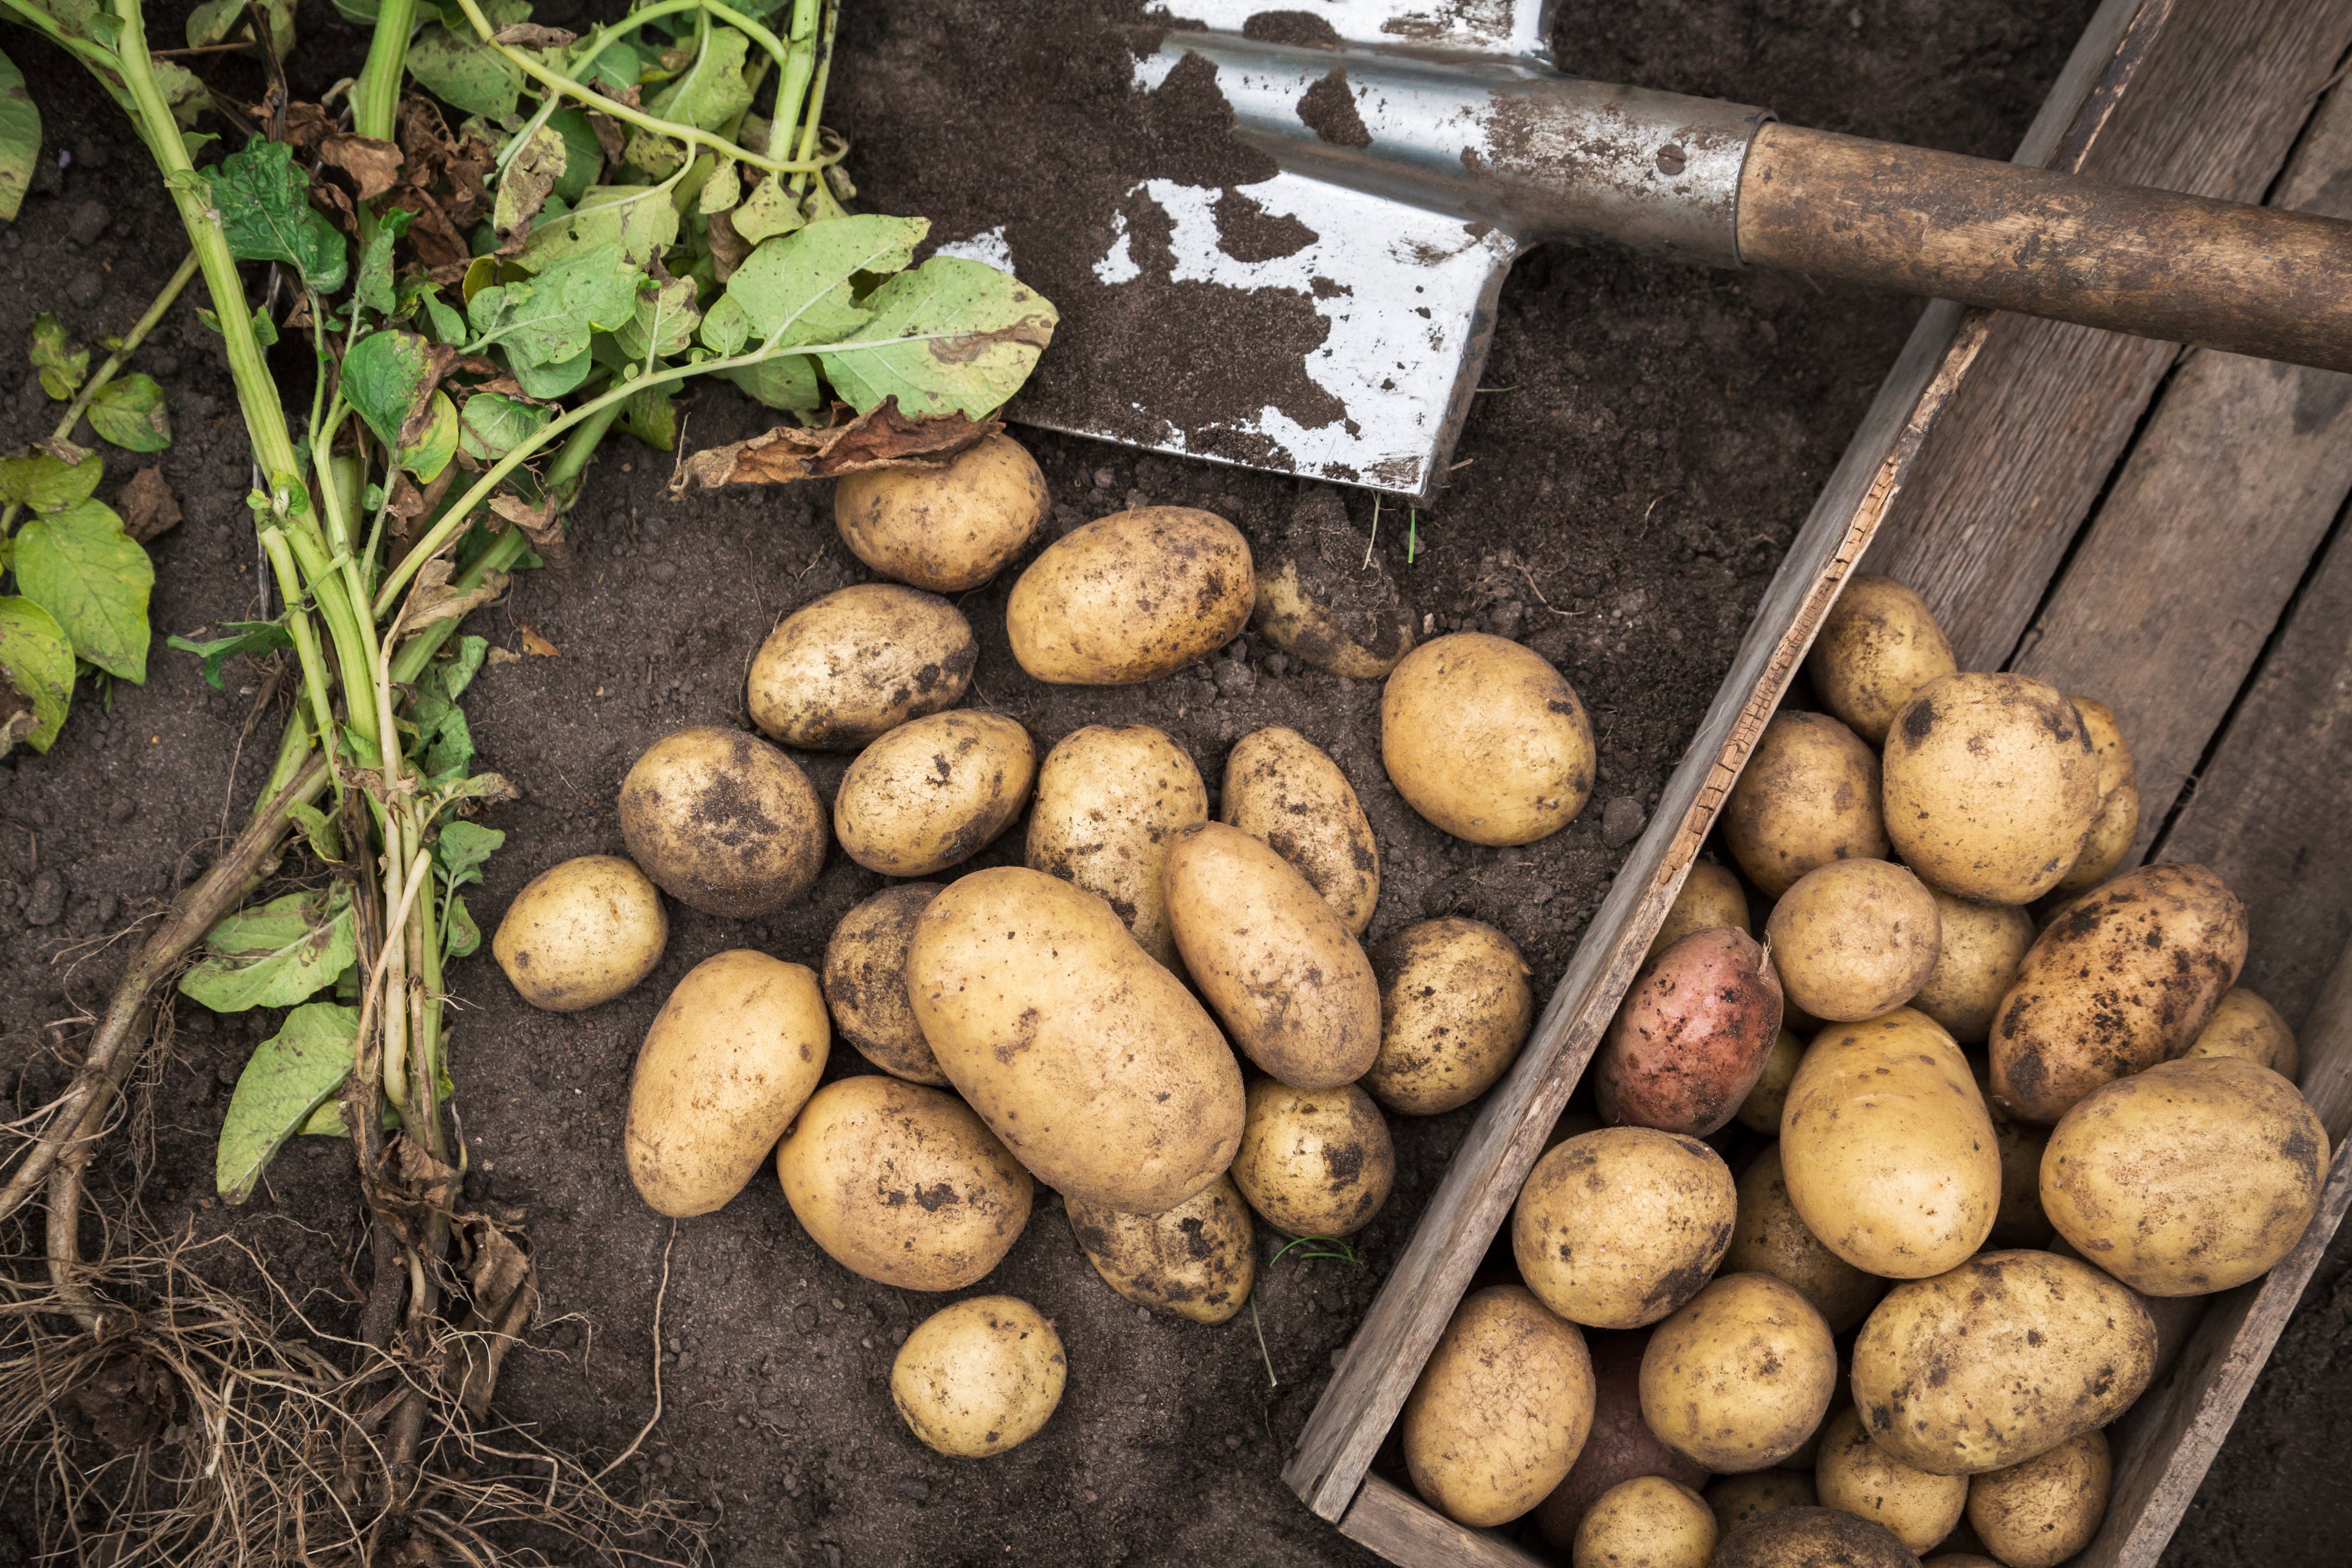
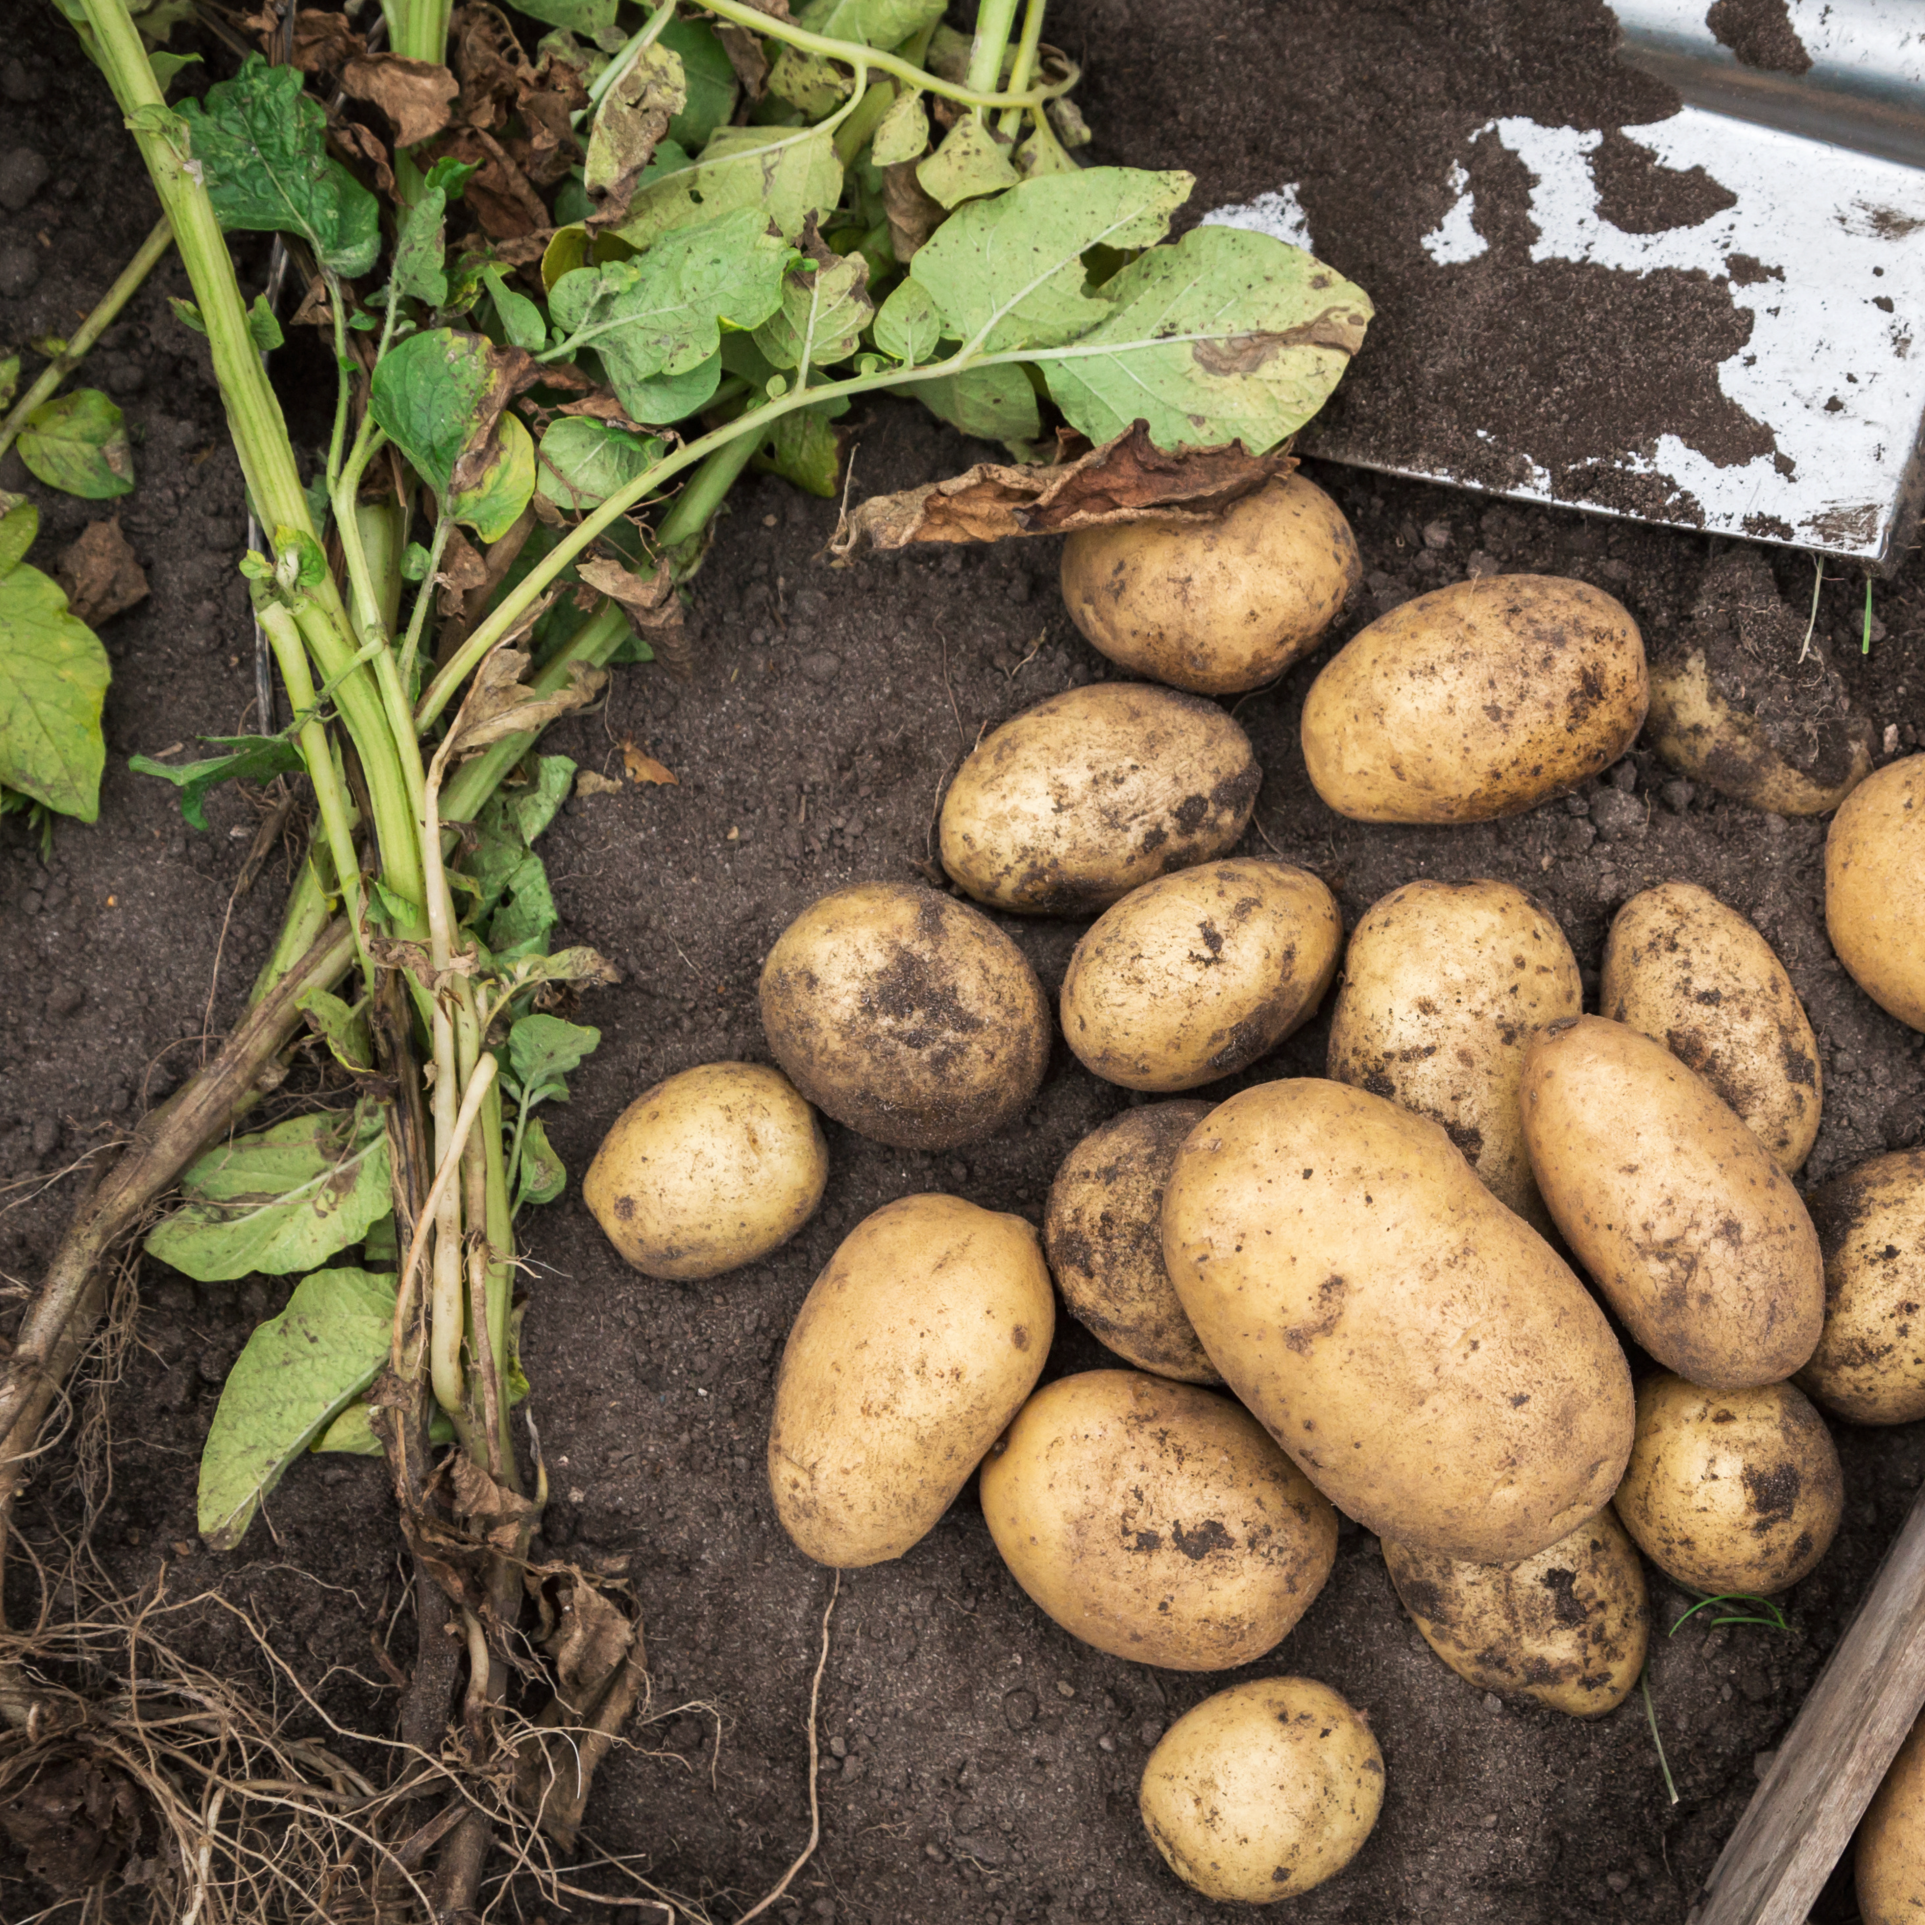
You may begin to harvest your potatoes 2-3 weeks after the plants have finished flowering. At this time you will only find small “baby” potatoes if you were to dig up a plant. Potatoes can be harvested any time after this, by gently loosening the soil, reaching under the plant, and removing the largest tubers, leaving the smaller ones to continue growing. If you want late potatoes for storage, wait 2-3 weeks after the foliage dies back. Carefully begin digging a foot or so outside of the row or mound. Remove the potatoes as you find them.
If the weather is dry, allow the potatoes to lay on the soil surface, unwashed, for 2-3 days so they can dry. If the weather is wet, or rain is expected, move the harvest to a cool, dry area (like a garage or basement) for the drying period. This drying step is necessary to mature the potato skin, which will protect the potato during storage. If by the end of September, the plants have not begun to die back, all of the foliage should be cut off to ensure your crop has ample time to mature before winter. Store your undamaged potatoes in a well-ventilated, dark, cool (about 40 degrees) location. Properly dried and stored potatoes should keep well for three to six months.
Onions
